
These sweet and sour chicken meatballs on skewers need to make it onto your meal-prepping routine asap. Perfect for dinner one night, and leftovers packed for lunch the following day with some rice, or simply prep a big batch and have lunch sorted for the next few days. These can be eaten hot or cold and are always a hit with kids and adults alike.

🧁 Sweet and Sour Chicken Meatballs
Before jumping to the recipe please note that the below information contains HOT TIPS for this recipe. We try and answer all your questions to guarantee a perfect lunchbox recipe every time.
Jump to:
🧂 Ingredients You Need
Sweet and sour chicken meatballs are super easy to make, and use a simple list of ingredients most people are likely to have on hand, or can easily pick up from their local store.
You are going to need:
- pineapple juice: you will only need one cup (pop below for some ideas for using up the rest of the pineapple juice if you buy a larger bottle);
- brown sugar: this is used to make the meatball glaze sticky so I would suggest sticking to brown sugar if you can. White sugar will work in a pinch, or you could try subbing in some honey if preferred;
- ketchup: be mindful of the sugar content of the brand you buy, as something with a lot of sugar is going to give you an extra sweet sauce;
- Worcestershire sauce: I can't say it either, but you can find it in the condiment aisle;
- garlic powder: you can use fresh if preferred, I prefer powder when making sauces though, as it makes them smooth without the need for blending;
- ground chicken: I have also made these with ground turkey and ground beef and they have worked perfectly;
- egg: average size will do (egg allergies? pop down below to the Important Teaching Tips section and find some alternatives)
- breadcrumbs: I prefer to use a panko breadcrumb for texture, but feel free to use wholemeal or regular breadcrumbs if that is what you have;
- grated onion;
- olive oil;
- minced garlic: you can mince it yourself or save time and use the pre-prepared minced garlic you can buy in jars;
- chopped parsley: fresh is best but dried will work too, simply reduce the amount used to 2 teaspoons;
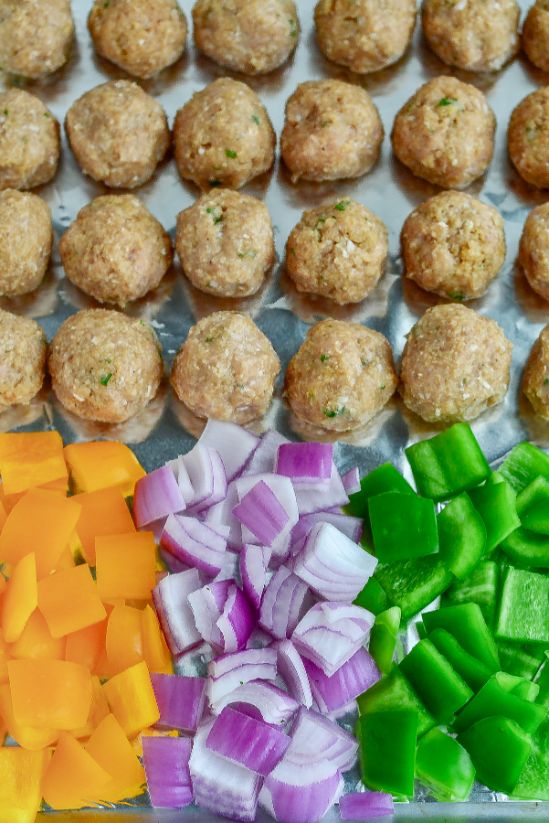
- bell peppers: I like to use two different colors for a nice pop of color on the skewer, but use what you have;
- red onion: you could use a yellow or brown onion instead, the red onion is just to add some extra color to make your lunch more exciting looking.
And of course, you will also need salt and pepper for seasoning, and whatever you plan on serving with the meatballs.
📋 How To Make Chicken Meatball Skewers
Sweet and sour chicken meatballs are super easy to make.
First, you are going to prep all of your ingredients.
I cannot stress how much easier cooking is if you have everything washed, chopped, prepped, and ready to go.
So here is a simple step-by-step list of what we are going to do:
- Soak the skewers
- Line a baking tray with baking paper or aluminum foil
- Chop the veggies
- Mix ingredients and assemble the meatballs
- Thread the skewers
- Pop into the oven
- Make the sauce
- Assemble and store or serve
Too easy.
Some tips for you though to speed things up a bit.
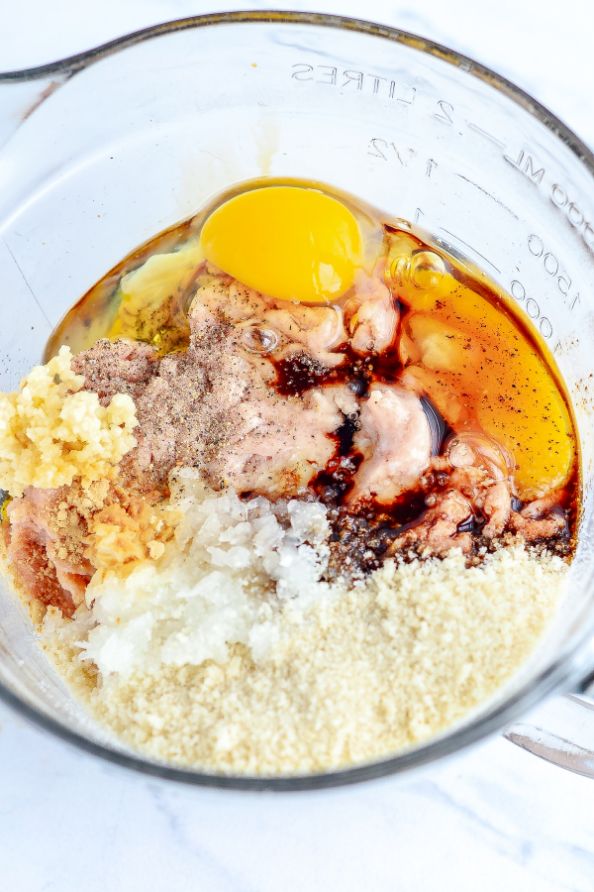
You can either add all of the ingredients to a food processor and process them until well combined, or you can use a big bowl and mix by hand.
Personally, I use a food processor, as I use the grater attachment to grate the onion first, but you do you.
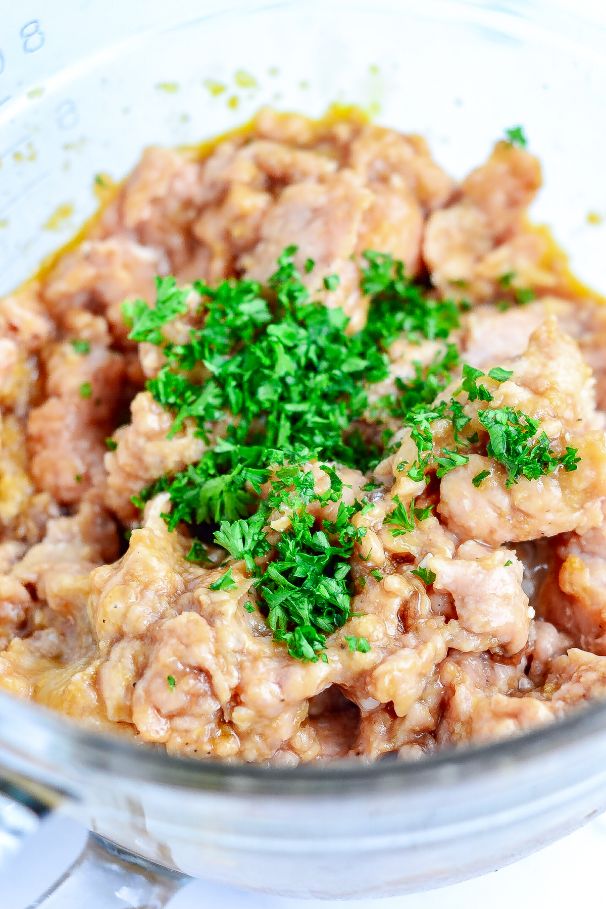
Once the mixture is well combined simply roll it into individual balls.
You want to make sure the balls are evenly sized so that they all cook at the same time. We don't want some overcooked and some raw in the middle.
For this, I use a tablespoon measuring spoon.
As you roll the balls, simply place them on a lined baking tray until you are ready to assemble the skewers.
Once all the meatballs mixture has been used to roll the balls then thread them onto the soaked skewers alternating with chopped bell peppers and onions.

Once your skewers are in the oven you are going to make the sauce.
Now, I use a microwave to make my sauce as I am all about saving time when it comes to prepping lunches for the week ahead, but if you don't like to use a microwave then you go right ahead and use a small saucepan on the stovetop.
Simply add all of the sauce ingredients, and either microwave or heat on the stovetop until the brown sugar has dissolved and the sauce has thickened up.
This should take a couple of minutes.
Once your skewers are done, the meatballs are cooked through and the vegetables are tender, simply use a pastry brush to brush the sweet and sour sauce over the top of all of the skewers.
Serve and drizzle over any leftover sauce.

💭 Important Teaching Tips
I have made these sweet and sour chicken skewers so many times and have picked up a few little tips and tricks along the way that I would love to share with you.
Skewers
If you are using wooden skewers then be sure to soak them in water for at least 30 minutes before threading the meatballs and vegetables onto them.
If you can soak them overnight that is even better.
If you skip this step you run the risk of the wooden ends burning during the cooking process.
Alternatively, you can use metal skewers.
Leftover pineapple juice
This recipe only calls for one cup of pineapple juice.
If you find that you have some leftovers don't let it go to water, simply add the leftover pineapple juice to a blender alongside some baby spinach, coconut water, frozen avocado, and a frozen banana or two and you have a quick and easy breakfast ready to go.
It can also be frozen in an ice cube tray or silicone molds.
Grating onion
You can grate the onion using a handheld grater if that is what you have.
I prefer to use the grater attachment on a food processor to grate onions as it prevents the fumes from getting into your eyes and making you look like you have been crying all afternoon.
If I am pulling out the food processor to grate the onion, then I always use it to mix the ingredients for the meatballs as well, rather than doing it by hand.
Additions and Substitutions
If you would like to bulk up your skewers and make the meatballs go further, then add some chunks of fresh or canned pineapple, chunks of zucchini, and some chopped broccoli florets.

🥢 Storing Leftovers and Meal Prep Tips
Leftovers should be stored in an airtight container in the fridge for about 3-5 days.
These are perfect for meal prepping.
Simply add some rice to the bottom of a meal prep container, followed by a couple of skewers and simply grab for lunch on the way out the door in the morning.
TIP: if you would like to serve these hot and do not like to heat plastic meal prep containers in the microwave then invest in some glass meal prep containers.

🍽 What To Serve With Sweet And Sour Chicken Meatballs
Serve cooked sweet and sour chicken meatballs with some cooked white or brown rice, quinoa, or pasta of choice.
Any other cooked grain of choice would also work well.
If you would prefer to keep it on the lighter side of things then you can serve it with a simple side salad, or some lettuce leaves such as baby cos, for stuffing the chicken skewers into (after removing the skewer obviously).
Packed Lunch: pair with some sliced fruit, Vanilla Greek Yogurt Muffins With Pancake Mix, chopped carrots, cucumber, and radishes with some Easy Homemade Ranch Dip.
👪 Frequently Asked Questions
Yes, these are perfect for prepping for the week ahead.
Simply make up the chicken skewers according to the instructions in the recipe card, cook, allow to cool, and pack into meal prep containers alongside some cooked rice.
They can be eaten hot or cold depending on what you have access to.
Absolutely, I always end up adding more vegetables to my skewers.
The perfect extras to add to these skewers would be chunks of zucchini, broccoli florets or chunks of fresh or canned pineapple.

Sweet and Sour Chicken Meatball Skewers
Materials
For the sweet & sour sauce:
- 1 cup pineapple juice
- 2 tablespoons brown sugar
- 1 tablespoon ketchup
- 1 teaspoon Worcestershire sauce
- ½ teaspoon garlic powder
- Salt & pepper to taste
For the meatballs:
- 1 lb (500g) ground chicken
- 1 egg
- ½ cup breadcrumbs
- ½ cup grated onion
- 1 tablespoon olive oil
- 2 teaspoons minced garlic
- ½ teaspoon garlic powder
- ½ teaspoon salt
- ¼ teaspoon ground black pepper
- 1 tablespoon finely chopped parsley
Assembling
- 2 bell peppers diced large
- 1 red onion diced large
Instructions
- Soak the wooden skewers in water for at least 30 minutes before using.
To Make The Sweet and Sour Sauce
- Combine the pineapple juice, brown sugar, ketchup, worcestershire, and garlic powder in a microwave safe bowl.1 cup pineapple juice, 2 tablespoons brown sugar, 1 tablespoon ketchup, 1 teaspoon Worcestershire sauce, ½ teaspoon garlic powder
- Microwave for 1-2 minutes, stirring halway through, until the brown sugar has dissolved and a thick sauce remains.
- Season with salt & pepper to taste.Salt & pepper to taste
To Make The Meatballs
- Preheat your oven to 375° F.
- In a large mixing bowl, combine the ground chicken, egg, breadcrumbs, grated onion, olive oil, minced garlic, garlic powder, salt, and pepper.1 lb (500g) ground chicken, 1 egg, ½ cup breadcrumbs, ½ cup grated onion, 1 tablespoon olive oil, 2 teaspoons minced garlic, ½ teaspoon garlic powder, ½ teaspoon salt, ¼ teaspoon ground black pepper
- Fold in the chopped parsley.1 tablespoon finely chopped parsley
- Form the mixture into 1.5 inch meatballs.
Assembly
- Gently skewer the meatballs, red onion chunks, and bell peppers chunks onto the skewers.2 bell peppers, 1 red onion
- Place your skewers onto a baking sheet lined with aluminum foil or sprayed with cooking spray.
- Place the baking sheet into the oven and bake for 20-25 minutes, flipping the skewers halfway through.
- Once the meatballs are cooked the whole way through and the veggies are tender, remove them from the oven and use a pastry brush to cover them with the sweet and sour sauce.
- Serve with steamed rice or grain of choice, or allow to cool completely before storing in meal prep containers and popping into the fridge for 3-5 days.
Notes
Nutrition
The information shown is an estimate provided by an online nutrition calculator. It should not be considered a substitute for a professional nutritionist’s advice.


Leave a Comment